

 Likes:


A lot of what I'm doing is for reasons that are probably a little obscure but from previous adventures in audio electronics I'm going to assume that most readers are far less interested in the theory and mathematics than am I, so I'll try to concentrate on the practical. If you want more theory just ask, I'm happy to oblige. To see what you might be getting into, look here.
This is “The Tonewood Project” because the end result uses a variety of Australian hardwoods which are renowned as tonewoods by Australian luthiers – see for example here, here, here, and here.
It didn't start out that way but that's a story for another day.
The woods are used to form tubes in combination with other materials chosen for mechanical and acoustic properties, namely boron fibre, carbon fibre and basalt fibre. These are then combined with stainless steel (currently KVA's MS2 alloy) to make the bike by an amalgam of standard metalwork and composite tube to tube construction techniques. Altogether this has been quite a journey as I had to learn the skills required for the steelwork and the woodwork and brush up on new techniques for the composites work.
The layup of each tube changes with its intended use. I can alter the number of layers and the compositions of these layers, including which woods are used where, which composites to use where and whether to use unidirectional or bidirectional fabric. I can also alter the layup angles for all the above, giving me a large amount of control over the tube properties. I use a simple spreadsheet system to make calculations of torsional, lateral and longitudinal properties.
The following description is representative but not necessarily typical.
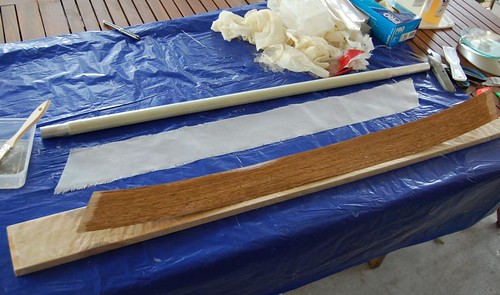
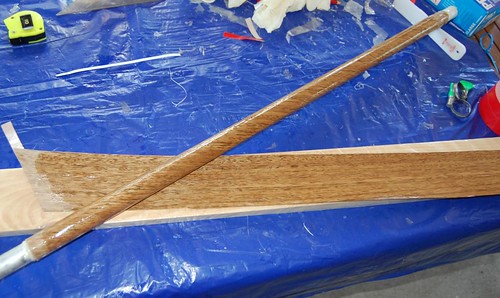
The base layer for this tube is Spotted Gum (Corymbia maculata / C citriodora), the wood on the left in the phot below, wound at 30 degrees. The other woods shown are Mountain Ash, Tasmanian Blackwood and Rose Gum, more detail abouts woods in a future post. First the required strip(s) of wood are cut from veneer leaf. The width required is given by Pi * diameter * cos(wind angle). Because wood bends almost exclusively on the compression side the diameter should be taken as the base diameter plus twice the strip thickness, so for a tube with a base diameter of 27.4mm and a leaf thickness of 0.6mm, a wind angle of 30 degrees requires a strip width of 28.6 * pi * 0.866 which is 78mm. I cut these strips with a Stanley knife and a straight-edge on a wooden board, which works OK, but courtesy of the people at Specialty Materials (the suppliers of boron fibre), I have since learnt to use a sharpened pizza cutter to get better tolerances and a straighter cut.
The strips are sanded both sides at 120 grit (not shown). Wear gloves to protect your work and a mask to protect your lungs – these woods have very high silica contents and the dust is a respiratory hazard. In addition some of them cause asthma like symptoms in susceptible individuals. Sanding such thin long strips is an invitation to buckling and cracking, some woods being more susceptible than others. It helps to tape the more susceptible ones to a backing board.
A Strips by Markwine, on Flickr
Once sanded and dusted, it's time to impregnate the wood and wind the tube. To prevent splitting, it is helpful to tape the outside ends of the strip with something robust like bookbinding tape. The epoxy I use is a low viscosity high Tg impregnating epoxy from ATL composites in Australia. The low viscosity improves penetration, the high temperature gives me good working life and stands up to the 120 degree heat cycle that the later prepregs require. The drawback is that curing requires a temperature controlled oven, so I built myself one.
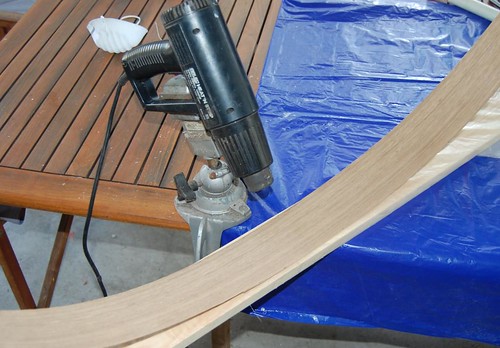
The wood is epoxy impregnated on one side by pulling the strip under a heat gun and applying the epoxy to the heated part of the wood. The phots belie the actual technique which is to do this in a continuous pass under the heat gun. The rate of travel and the distance of the gun are adjusted to get the right level of heating. You can judge this by the apparent viscosity of the resin – at the right temperature it brushes on like water; too low and it's sticky, too high and it smells baaad. I tried vacuum impregnation in a chamber I made for this purpose and solvent impregnation using a commercial epoxy additive but neither works as well as this simple heating setup.
B Heating by Markwine, on Flickr
C Impreg by Markwine, on Flickr
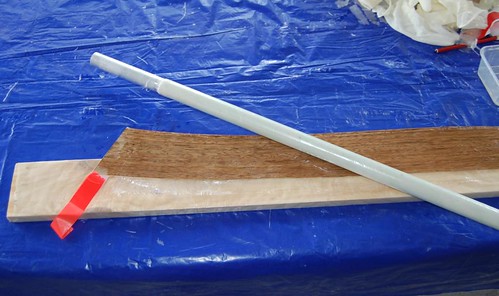
To ensure complete waterproofing of the inner surface of the tube, I add a strip of very thin (75 gsm, somewhat less than 0.1mm thick) glass fibre to this face, cut so it overlaps slightly. The glass is also wet with epoxy. Getting this to all wind together correctly is fun and games.
D post impreg by Markwine, on Flickr
First, cross the strip with the mandrel at the correct angle. I'll talk about mandrels another day, they turned out to be the most difficult part of the whole process.
E ready to wind by Markwine, on Flickr
Wind up one end and clamp it – the clamps shown here don't work very well, I'm developing new clamps that allow repositioning. Note this phot was taken on a different day with a different mandrel: I'm using my wife's SLR and trying not to get epoxy all over it. This and my woeful photography skills mean some shots didn't come out.
F winding by Markwine, on Flickr
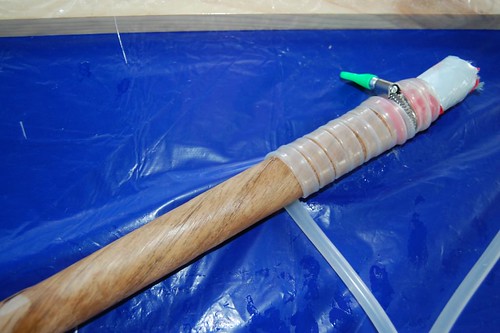
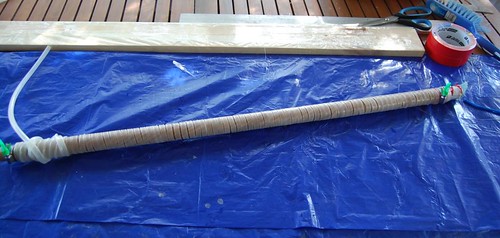
Continue winding down to the other end and clamp that. The major problem that occurs here is keeping the wind cylindrical – if part of it goes conical it throws everything out and you'll get overlaps and / or gaps. If all goes well and the sides are aligned, start applying the pressure wrap – I use a length of silicone tubing pulled taut as I wrap. I chose silicone because it has excellent temperature resistance and good elasticity. It also allows me to observe the wind as I wrap so that I can check the edge alignment.
G Wound, start wrap by Markwine, on Flickr
Once fully wrapped, it's time to bake the epoxy. I've found that too high an initial temperature can cause problems, so I start with a couple of hours at 40 degrees before raising the oven to 60 to complete the cure.
H wrapped by Markwine, on Flickr
Once cured, unwrap the tube, sand off any epoxy ridges (which form between the wraps of tubing as epoxy is squeezed out) and check the tube is cylindrical.
To do the second layer, both the outside of the tube and the inside of the second strip are epoxy impregnated. Note the orientation of the second strip, which will wind in the opposite sense to the first. The rest of the process is as per the first strip.
I Second Wind by Markwine, on Flickr
That's enough for now, more later.


 Reply With Quote
Bookmarks