
 Likes:
 ha! i like that.Originally Posted by EricKeller


 Sock Doping


ha! i like that.
dan polito
Newb
Thank you for the positive comment. As a newbie to this site I hoped for a bit more moral support...
phutphutend
Joe McEwan
Administrator


Spend the time and make the commitment to line up all the surrogate joints I mentioned earlier. Braze them. Make mental notes. Report back. Don't "just" do one and measure it. You're self-learning there with no safety net. The only antidote is repetition. Lots of it. At some point after dozens or maybe hundreds of tries, a light will go on. Make that your goal. The distortion is only one hurdle for you. PS anyone can finesse a melted brass rod into a decent looking joint. But that joint, elegant or not, is a small part of a much larger whole. The way I look at this single task is that there is no right way to accomplish it. But there is a wrong way. You need to be brazing a whole lot more, and worry less about the distortion at this early stage.
In the drops
I don't know the Bicycle Academy technique, but it sounds reasonably similar to mine - I use a midget torch and keep the heat very small and controlled.
One thought that occurs is are you doing the fillet in one pass? That might be causing a curvature, which is then set by the fillet. I do several passes - a root fillet only a bit wider than the rod (i.e. about 3mm) then several more passes depending on how large a fillet I want. So the whole joint is warm, but the real heat is kept to small areas.
Another thought is to check your mitring - if there's a gap at the corner, it can be pulled shut as the brass cools.
The solution doesn't lie in a rigid jig - no jig in the world will be rigid enough to prevent a tube like this bending.
If we're doing pics, here's one I did today - not the most close up, sorry.
27.2 test bar drops in happily.
Fausto
Do yourself a favor and buy a 20' stick of .035" 4130. Make practice joints until you can't find places to braze the pieces to. Then try another seat tube and see if you have a better outcome.
Eric Doswell, aka Edoz
Summoner of Crickets
http://edozbicycles.wordpress.com/
http://www.flickr.com/photos/edozbicycles/
In Before the Lock
No Chain
Your HAZ on the seat tube is a tight ring around the joint.
Steve's HAZ is two bands around the circumference of the seattube equal distance away from the joint. He's heated the whole seat tube up to temp, when that joint structure cools it's going to remain straight.
When your joint structure cools the haz ring is pulling the tube out of shape.
Depending on sequence this would be a non issue for a hard tail as one might just tac the seat tube, top tube and seat stays then braze it all in one thus evening heating the seat tube around it's full circumference. On the FS you're not heating that backside of the joint.
Brian Earle
North Vancouver, BC
Built a few frames in my garage.
Slide to the back
Nice brazing, small HAZ, looks like good heat/hand/filler control. Well done, and that's not gratuitous moral support; it looks very good. My guess is that your coped joints are tight/excellent (though it was sage advice) and that the pre and post heats are what is needed. Carry on and let us know how it goes.
You might try a post heat cycle on the test pieces you just finished, just to see if it does any good. Nothing to lose.
Newb
Thanks everyone. We're slowly getting there...
There been in a few posts saying do loads of test joints until you work it out. This is a science, I think with a bit of thought we can work it out a lot quicker than that.
There's also a lot of talk about pre and post heating. This is definitely my next step. But could I have some details..
Do I get the whole area red hot then set about the joint? Do I just get it warm? Do I need to keep topping up the offside joint heat as I braze? What do I do when post heating, get the whole area to the same temperature?
Please let me know the processes of pre and post heating.
phutphutend
Joe McEwan
In the drops
I do no pre- or post-heating at all, just get stuck in with the torch on a tiny flame. Tubes are tacked in the jig first of course, then do a root pass, followed up immediately by a second and then a third if needed. As soon as the last drop of brass has solidified, put the torch down.
Opinions may vary on this.
There is a lot of science involved in framebuilding, but there's also a lot of practice to get a feel for temperature, capillary action and the like. Unless you plan to use a laser thermometer on your goggles to measure temperature, you're going to have to do it by eye, and that kind of thing takes practice to get a feel for it.
Rolls with style
IMG_0399.JPGIMG_0288.JPGIMG_0289.JPG
It's an experiment to see if you could join two pieces of .6mm and insert the proper seat tube afterwards with no reaming.
Not a bicycle.
This is an extreme experiment to show how even heating is required to minimize distortion.
THIS is a bicycle braze(s), the same ones I posted already in this thread - go mental.
Son, you have allot of walking to fill my boots.
You've been treated with considerable civility.
I don't hold hands, neither.
And no participation awards.
GETS IT
- Garro.
Steve Garro, Coconino Cycles.
Frames & Bicycles built to measure and Custom wheels
Hecho en Flagstaff, Arizona desde 2003
www.coconinocycles.com
www.coconinocycles.blogspot.com
Rolls with style
Three passes?
NO
You are off base if you think tinning & then two filler passes isn't pre or post heating!
And if you want to do damage to steel, it's not just how hot you get it, but how long it stays that hot.
And think about the effect of a tiny fillet cooling rapidly vs a big one cooling slowly.
I could spell it all out, but there is nothing to learn that way.
One pass, 3/32nd or bigger - get in, get out - put some F'ing metal on there
- Garro.
Steve Garro, Coconino Cycles.
Frames & Bicycles built to measure and Custom wheels
Hecho en Flagstaff, Arizona desde 2003
www.coconinocycles.com
www.coconinocycles.blogspot.com
In the drops
Grimpeur
Somewhere buried in the archives (a treasure chest of info) there is mention from a seasoned builder regarding distortion, and his recommendation was to put flux on the backside of the joint then heat the whole joint. Once the flux on the backside, and the whole joint, were up to temp then the joint was ready to braze. Worth a try in your pursuit to find the source of your distortion.
Rolls with style
That's not an opinion.
It's a fact.
- Garro.
You mean Dave Kirk?
Yep.
He said that quite some time ago, and rather then disregard the facts graciously laid down for nothing by a man who used to build a custom bike a day or eschew his advice after 1000's of frames, advice passed down mouth to mouth from masters, rather then post my take on it, you know what I did?
I took his advice, and I'm glad I did, it saved me time & made me money.
- Garro.
Steve Garro, Coconino Cycles.
Frames & Bicycles built to measure and Custom wheels
Hecho en Flagstaff, Arizona desde 2003
www.coconinocycles.com
www.coconinocycles.blogspot.com
In the drops
I've often wondered what makes framebuilders like this - I think it's probably down to the low entry requirements and the lack of qualifications. None of us have an Ivy League degree in framebuilding, so the only way to assert the dominance that some people seem to need is by being arses on the internet.That's not an opinion.
It's a fact.
- Garro.
It's just sticking some steel tubes together with brass. People have been doing it for centuries in one form or another. Like with many things, there's more than one way to get a satisfactory result. My way has been developed over 20 years of professional framebuilding, it works for me and it might work for the OP.
Grimpeur
Dude. Quit being an asshole yourself.
Rolls with style
Helpful?
Totally beyond me.
You've been brazing for 20 years?
Man, you sure are touchy.
- Garro.
Steve Garro, Coconino Cycles.
Frames & Bicycles built to measure and Custom wheels
Hecho en Flagstaff, Arizona desde 2003
www.coconinocycles.com
www.coconinocycles.blogspot.com
In the drops
Ach, I can't be bothered. OP, as you can see, there's varying opinions on the matter.
Rolls with style
Along with ways to do it correctly.
Which is the path I'm trying to put you on.
- Flux inside & out
- Watch your flux, go for full clear like in my pics
- Tack big, tack small, just make sure your tacks have "root"
- The time to start brazing (for reals) is just before your tacks pop
- Move quickly and evenly laying even puddles, feathering your heat to feather your edges, saving you tons of time on cleanup - define your fillet width with the first puddle, then lay the amount/length of rod every puddle
- Don't "rob" your puddles, as you start the next puddle, don't let your previous puddle slop into you new one, creating a void
- Watch your "ears" as they will drink excess filler, creating an internal bulge
- Post heat to clear = if you have different temp zones, you will have ripples & bulges.
It's the difference between trying to force a cutter through an oval BB shell post braze, or just spinning them in with a couple fingers - that, and longevity of the structure.
I take my trade seriously, hope others do as well, and try to circulate safe practices.
Sorry if that rubs some wrong or hurts feelings.
But that's how it is.
- Garro.
Steve Garro, Coconino Cycles.
Frames & Bicycles built to measure and Custom wheels
Hecho en Flagstaff, Arizona desde 2003
www.coconinocycles.com
www.coconinocycles.blogspot.com
Grimpeur
It may have been him, I don't recall, but I do recall the point hitting home to me. Dave's page, and info in the archives here, is a wealth of good info and good practices for building frames. I try to take notes on things that stick out to me. Hell, I have notes on what rod size you (Garro) use on which joints.
Posting Permissions

 Reply With Quote
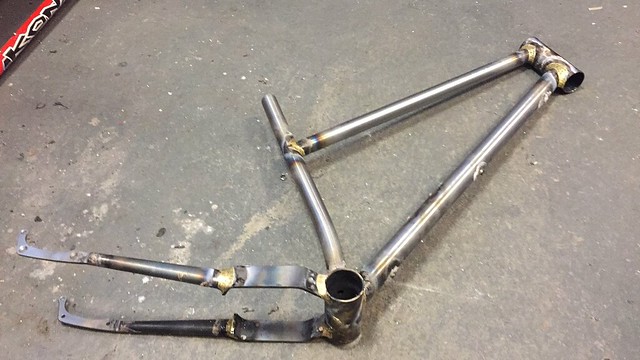
Bookmarks